So now that I've covered points, lets switch over to 3DPolylines. In this post we will create a VBA routine to take a 3DPolyline and create a profile. The basic code is easy to do, its catching all of the errors which is difficult. In this post I'll just be covering the easy stuff.
The first thing we need to do is create a blank dvb file or start from another dvb file. In this example I'll be starting from scratch. To do this type VBAMAN at the command line. Choose the New option and then Save as.. to give it a name and location you can remember. The next step is to hit the Visual Basic Editor in the bottom left hand corner of the VBA Manager. Once in the VBA editor go to Tools, References and add the Autodesk Civil Engineering Land 6.0 Object Library to the list of references.
Next go up to Insert on the menu bar and choose Module. Expand the Modules on the left to show the Module1 and make the window current. Start of by adding the text Option Explicit. This will make it so all of the variables will have to be declared in the module. Under the Option Explicit line type Sub CreateProfileFrom3DPolyline() or any other name you like. It should automatically add a line that states End Sub.
So the first thing we need to do is select the 3DPolyline and alignment and then check to make sure the user has selected the appropriate object. You also may want to add a line that states "On Error Resume Next", this will help hide some of the bad code here and not give the user an error message. The code that selects the objects is below:
Now if you run the code you should be able to select a 3DPolyline and alignment and not get any error messages. So now lets process the 3DPolyline we selected. The vertex information is stored in the coordinates of the object. There is three parts stored for each vertex, the X, Y and Z. We will use the count of vertices to determine how big to make the array for the station and elevation data (the same way I did yesterday). The -1 is because the arrays start at 0 instead of 1. Also in the code is calculating the station and offset information, while we don't need the offset information we get it regardless. I have some constants in there to cycle through the appropriate data. The completed code so far is below:
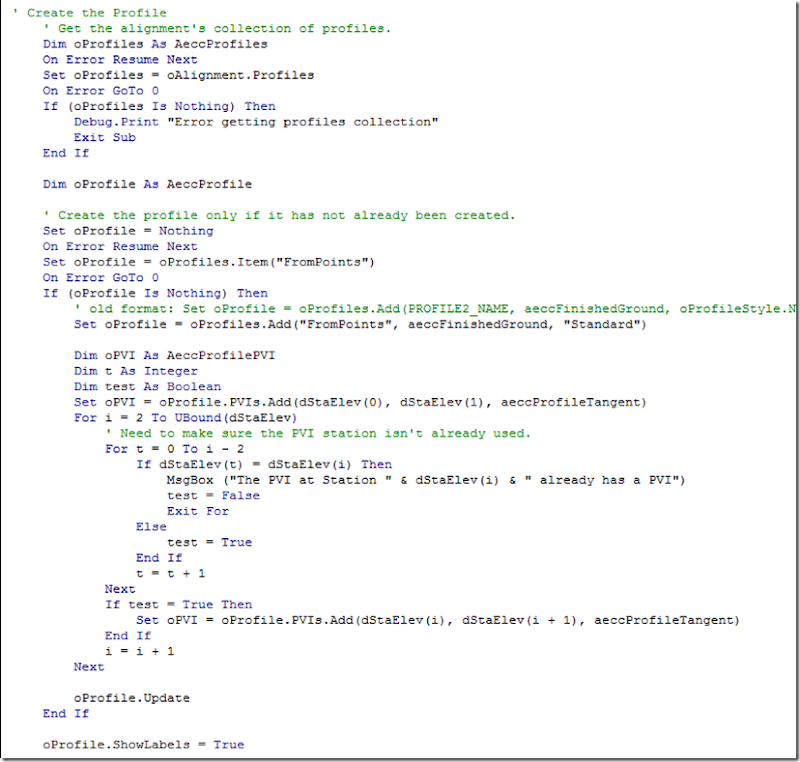
So now I'll just take the profile creation code from the previous post and add it here. It has the same limitations the code had yesterday. The drawing has to have Standard as a Profile Style and not have a FromPoints profile already created for the selected alignment. The code is below:
 Now like I said when I started, I just covered the easy part of the code. If the 3DPolyline extends past the limits of the alignment I think there will be trouble or incorrect data, but it should be quicker than typing the information into the profile. If you are too busy to type in the data you can buy the code up to this point using the link on this page. For the same price as stated in the previous post, you'll get both the completed code from that post and this post.
Related Posts:
Create a Profile without a Surface - VBA
Create a Profile Without A Surface - 3DPolyline VBA
Create a Profile Without A Surface - 3DPolyline VBA II
Create a Profile Without A Surface - 3DPolyline VBA III


No comments:
Post a Comment